Introduction to Node-RED

Node-RED
04 May
Maksym Gerasymchuk
Background

Introduction to Node-RED 1What is Node-RED

Node-RED advertises itself as “a visual tool for wiring the Internet of Things”. But actually, it can be easily used for other applications to quickly assemble flows of services and rapid project prototyping. The focus is on a “visual programming” approach where you can connect devices and services all together. It means you can spend more time making stuff “talk” to each other rather than worrying about all of the interfacing.

Every Node-RED app consists of nodes – “building blocks” that you drag and drop onto the canvas and wire together to form the logical flow. Applications are created by composing data flows through a series of connected nodes. Each node offers different functionality that can range from a simple debug node to be able to see what’s going on in your flow, through to a serial port node that allows you to connect to an outbound serial port.

Introduction to Node-RED 2

Figure 1. Sample of Node-RED flow displayed

Node-RED is based on Node.js. The Node-RED application runs as a web server, and you customize and manipulate functional “flows” from any computer’s browser, local or remote.

Node-RED can run stand-alone or can be easily integrated into cloud services, such as the IBM Bluemix environment. Bluemix provides special Bluemix node types to make devices integration easier. Besides Bluemix, there are cloud providers, such as “FRED” (free Node-RED) where you can immediately get a running instance at no cost for free.  

Next I would like to outline a step by step tutorial and show how to:

  1. install Node-RED locally
  2. develop custom node that sends push notifications to IOS device
  3. design simple flow
  4. publish your first Node-RED application on IBM Bluemix.

Installing Node-RED

You can easily install Node-RED with npm:

$ sudo npm install –g nodered

Then run:

$ node-red

The visual interface of Node-RED is a web UI served by default at port 1880 (Figure 1).

Introduction to Node-RED 3

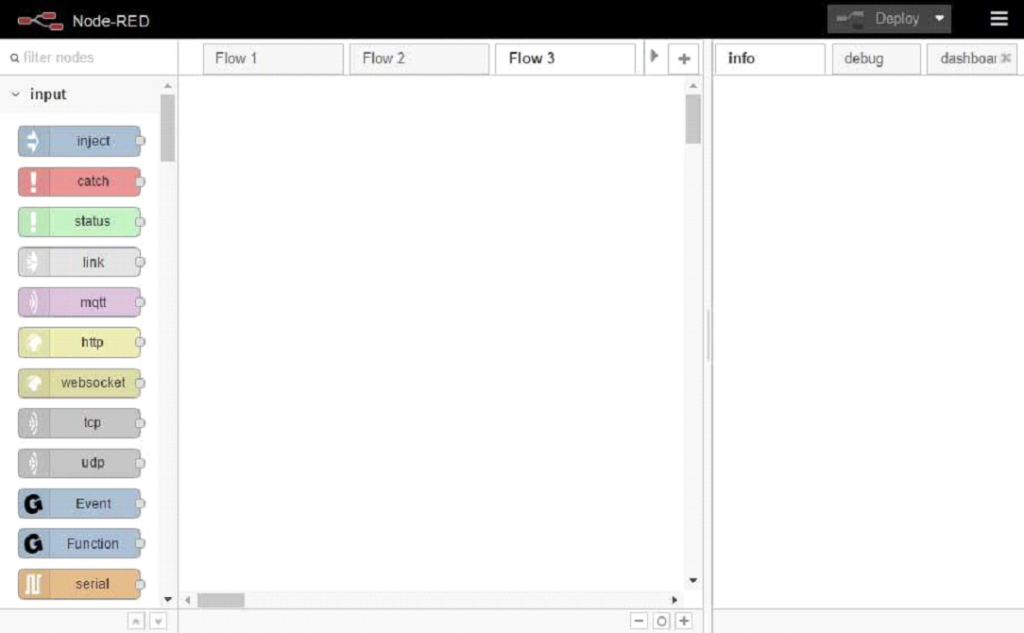
Figure 2. Node-RED UI

There are few simple steps to compose and run your flow:

  1. Pick some nodes from left palette and drag them onto the workspace
  2. Connect the nodes together by dragging between the output port of the one to the input port of the other.
  3. Click the Deploy button at the top.

Simple!

The data that is passed from a node to a node is called a “message”. A message is a JSON object with at least one element called “payload”. See an example of an actual data sent from node:

{
	"topic": "",
	"payload": "",
	"notification": {
		"body": "Dummy test",
		"sound": "default",
		"badge": 1,
		"expiry": 1491997296,
		"priority": "10"
	}
}

One good thing about Node-RED is that the flows are stored in JSON format. Sharing code is a simple matter of copying your flow (or part of it) and sending it to anyone as a plain-text.

How to create custom node

It’s simple to extend the system with your own nodes based on any available Node.js library. Let’s take a look at how to create custom node on your own.

As an example, we will create a node for sending push notifications to iOS devices from our Node-RED flow.

Each Node-RED node consists of two files: JavaScript file and HTML file. JS file defines runtime logic and HTML file contains node configuration (metadata), edit dialogue markup and help text.

While developing you can simply put them inside nodes directory in your user directory, typically ~/.node-red/nodes. Later we will create npm module package from our node.

Here is a node .js file template:

module.exports = function(RED) {
    function APNNode(config) {
        RED.nodes.createNode(this,config);
        var node = this;
    }
    RED.nodes.registerType("apn", APNNode);
}

The following example shows that each node is wrapped as a node module. The module exports a function that gets called when the runtime loads the node on startup. The function is called with a single argument, RED, that provides the module access to the Node-RED runtime API.

Constructor function, APNNnode, defines node itself. It is called whenever a new instance of the node is created. Single input parameter, config, represents an object containing the node properties set in the flow editor.

The function calls the RED.nodes.createNode function to initialize the features shared by all nodes. Finally, the APNNnode function is registered with the runtime using the name for the node, apn.

The following example defines a node .html file, we are going to start with:

<script type="text/javascript">
    RED.nodes.registerType('apn', {
        category: 'push',
        color: '#a6bbcf',
        defaults: {
            name: { value: "" }
        },
        inputs: 1,
        outputs: 1,
        icon: "apple_icon.png",
        label: function () {
            return this.name || "apn";
        }
    });
</script>
<script type="text/x-red" data-template-name="apn">
    <div class="form-row">
        <label for="node-input-name"><i class="icon-tag"></i> Name</label>
        <input type="text" id="node-input-name" placeholder="Name">
    </div>
</script>
<script type="text/x-red" data-help-name="apn">
Node help text here
</script>

Please note, that RED.nodes.registerType function should use the same node name string as we used while registering node function in .js file. Also, the same name should be used for help section (as data-help-name attribute).

In html wrapper we specified separate palette category for our node (‘push’) and single editable property, ‘name’, that represents node displayed name on Node-RED dashboard.

Next, we would need to add some configuration parameters for sending push notifications. Since we need to share configuration among multiple apn node’s instances, it makes sense to create separate ‘configuration’ node for that.

A configuration node is defined the same way as other nodes but should have a category property set to “config”.

In order to store configuration in an object-oriented style, we would need to divide the whole set of properties into two configuration nodes: application properties (apn-app) and token properties (apn-token).

apn-app  node contains token data, topic (your app bundle id) and production flag (specifies which environment to connect to: Production (if true) or Sandbox). For detailed information about configuration options please, see provider node-apn documentation.

Please, find below apn-app and apn-token node respectively (skipped template and help sections in brevity purposes):

RED.nodes.registerType('apn-app', {
    category: 'config',
    defaults: {
        name: { value: "" },
        token: { value: "", type: "apn-token", required: true },
        topic: { value: "", required: true },
        production: { value: false }
    },
    label: function () {
        return (this.name || this.topic) + " - " + (this.production ? "Production" : "Sandbox");
    }
});
RED.nodes.registerType('apn-token', {
        category: 'config',
        defaults: {
            name: { value: "" },
            key: { value: "", required: true },
            keyId: { value: "", required: true },
            teamId: { value: "", required: true }
        },
        label: function () {
            return (!!this.name ? (this.name + " - ") : "") + this.keyId + " - " + this.teamId;
        },
});

The most interesting is that we can use nested configuration nodes – embedding one configuration as a section inside the other one. Here we are adding apn-token node into apn-app configuration node:

token: { value: "", type: "apn-token", required: true }

Now we can embed apn-app configuration node into our main apn node:

app: { value: "", type: "apn-app", required: true }

There’s only one thing left before we can start working on sending notification stuff. It will be great to have an ability to compose notification messages we want to send on devices in a convenient way. Let’s create a separate node called apn-notification that just builds payload object that represents notification’s data.

Here you can find a full code of editor template for the following node. It’s quite big because of a variety of available parameters and conditions for notification formatting, although it’s beyond the scope of our article. Let’s focus on few key features we haven’t covered so far.

A node definition can include functions to customize the editor behavior:

  • oneditprepare is called immediately before the dialog is displayed.
  • oneditsave is called when the edit dialog is okayed.
  • oneditresize is called when the edit dialog is resized.

For example, we store the expiry property in our apn-notification node  as a cron-like string: ‘* * 1 *’. The node defines oneditprepare function that can parse that string and present a more user-friendly UI (please see setupExpiry function). It also has oneditsave function that compiles the options chosen by the user back into the corresponding cron string.

In apn-notification node’s runtime file (it’s .js file) we parse an object containing properties set in the flow editor. We do parsing inside a listener to the input event which gets called whenever a message arrives from the up-stream nodes in a flow. After composing notification payload we would need to send it to the down-stream nodes in a flow (apn  node). It can be done using send function:

msg.notification = payload;
node.send(msg);

Also, we can display information in editor UI that describes node status.

This is done by calling the status function. Following code snippet shows the way a user is being informed about an error while parsing notification data:

node.status({ fill: "red", shape: "dot", text: err.message })

See below how it looks on editor UI:

Introduction to Node-RED 4

Figure 3. Node status message

One final thing we need to do is implementing core part of our main apn node that communicates with Apple Push Notification service. We would need to use node-apn Node.js module for this purpose.

First of all, we need to install this module. Go to your Node-RED home directory (by default ~/.node-red) and run:

$ npm install apn

In our apn node we load in external node.js apn module and create a new connection to Apple Push Notification provider API:

var apn = require('apn');
var provider = new apn.Provider({
    token: node.app.token,
    production: node.app.production
})

Next, we would need to fulfill apn object. Notification with data we retrieved as input from our apn-notification node.

var notification = new apn.Notification();
if (content.title && content.body) {
    notification.title = content.title;
    notification.body = content.body;
} else if (content.body) {
    notification.alert = content.body;
}

Next, we would just send the notification to the API with send and handle the response, passing result/error to the down-stream nodes in a flow:

provider.send(notification, tokens).then(function (response) {
    node.status({
        fill: "green",
        shape: "dot",
        text: response.sent.length + " sent, " + response.failed.length + " failed."
    })
    msg.result = response;
    node.send(msg)
}).catch(function (err) {
    node.status({ fill: "red", shape: "dot", text: err.message })
    node.error(err);
})

Please, note that we also should specify target devices tokens as an array property in input message:

if (msg.tokens && msg.tokens.length > 0) {
    tokens = msg.tokens;
} else {
    var err = new Error("Missing recipient");
    node.status({ fill: "red", shape: "dot", text: err.message })
    node.error(err);
    return;
}

The right way to do that by injecting array as input for apn-notification node.

That’s it! Let’s see how our final flow looks:

Introduction to Node-RED 5

Figure 4. Final flow

The flow we created is represented by the following json:

[{"id":"df598d11.fda52","type":"apn","z":"54274389.8b470c","name":""
,"app":"24c835e5.6a5f0a","x":816.8264770507812,"y":319.0278015136719
,"wires":[["2084bca.95c4c44"]]},{"id":"3e5f3f3b.b80f1","type":"apn-notification"
,"z":"54274389.8b470c","name":"","title":"","body":"Dummy test","action":""
,"badge":"1","sound":"default","contentAvailable":"","mutableContent":""
,"urlArgs":"","category":"","expiry":"* * 1 *","priority":"10","payload":""
,"x":664.8332977294922,"y":318.2257080078125,"wires":[["df598d11.fda52"]]}
,{"id":"3f828632.dd643a","type":"inject","z":"54274389.8b470c","name":""
,"topic":"","payload":"","payloadType":"date","repeat":"","crontab":""
,"once":false,"x":317.8263244628906,"y":318.07293701171875
,"wires":[["3baeee8c.90fbb2"]]},{"id":"3baeee8c.90fbb2","type":"function"
,"z":"54274389.8b470c","name":"Device Token"
,"func":"msg.tokens = [\"device_token_here\"];  \nreturn msg;"
,"outputs":1,"noerr":0,"x":483.82640075683594,"y":318.5069580078125
,"wires":[["3e5f3f3b.b80f1"]]},{"id":"2084bca.95c4c44","type":"debug"
,"z":"54274389.8b470c","name":"","active":true,"console":"false"
,"complete":"true","x":938.8368530273438,"y":319.6528015136719
,"wires":[]},{"id":"24c835e5.6a5f0a","type":"apn-app","z":""
,"name":"","token":"6204d76.7ac3228","topic":" ","production":true}
,{"id":"6204d76.7ac3228","type":"apn-token","z":"","name":"","key":" "
,"keyId":" ","teamId":" "}]

Creating node package

If you would like to distribute your node and/or publish to the npm repository you would need to create a package. Along with .js/.html node’s files package should contain package.json that specifies what nodes the module provides (along with a pointer to their .js files) as well as dependencies on other npm modules.

Here is a directory structure for our node package:

– package.json

– apn

  |-apn.html

  |-apn.js

  |-apn-app.html

  |-apn-app.js

  |-apn-notification.html

  |-apn-notification.js

  |-apn-token.html

  |-apn-token.js

  \-icons

      |-apple_icon.png

– README.md

– LICENSE

package.json looks like:

{
  "name": "node-red-contrib-push",
  "version": "0.0.1",
  "dependencies": {
    "apn": "2.1.3"
  },
  "description": "Push notifications for node-red",
  "keywords": [
    "node-red",
    "apn",
    "push",
    "notifications"
  ],
  "node-red": {
    "nodes": {
      "apn": "apn/apn.js",
      "apn-token": "apn/apn-token.js",
      "apn-app": "apn/apn-app.js",
      "apn-notification": "apn/apn-notification.js"
    }
  }
}

Deploying on Bluemix

IBM allows us deploying our customized Node-RED application on Bluemix platform within few simple steps.

Click here to create and deploy Node-RED template application, based on Deploy To Bluemix enabled repository :

Introduction to Node-RED 6

As setup wizard completed, you will get an access to IBM Bluemix DevOps Services dashboard. You could use either default repository or attach your own github repo on project settings page. To add additional nodes, you should either:

  • add them in /nodes directory and add their dependencies to package.json
  • add their npm package name to package.json 

In order to add our custom nodes we just put all nodes files inside /nodes dir and update package.json (in repository root) with:

dependencies": {
     "apn": "2.1.3"
},

"node-red": {
      "nodes": {
            "apn": "nodes/apn/apn.js",
            "apn-token": "nodes/apn/apn-token.js",
            "apn-app": "nodes/apn/apn-app.js",
            "apn-notification": "nodes/apn/apn-notification.js"
       }
},

As you push changes to the repository, application will re-deploy automatically. And our application is already in a cloud. Easy, isn’t it?

Conclusion

Node-RED is a rapidly growing tool for getting your idea up and running quickly. For example, when building a prototype or event-processing engine. It’s also easy to extend it with your custom nodes as shown above. Feel free to experiment, create useful nodes and flows to contribute to Node-RED community!

Ream more

Contact us to discuss your project

Submit a request